Storefront Creation
Selling on bosonapp.io
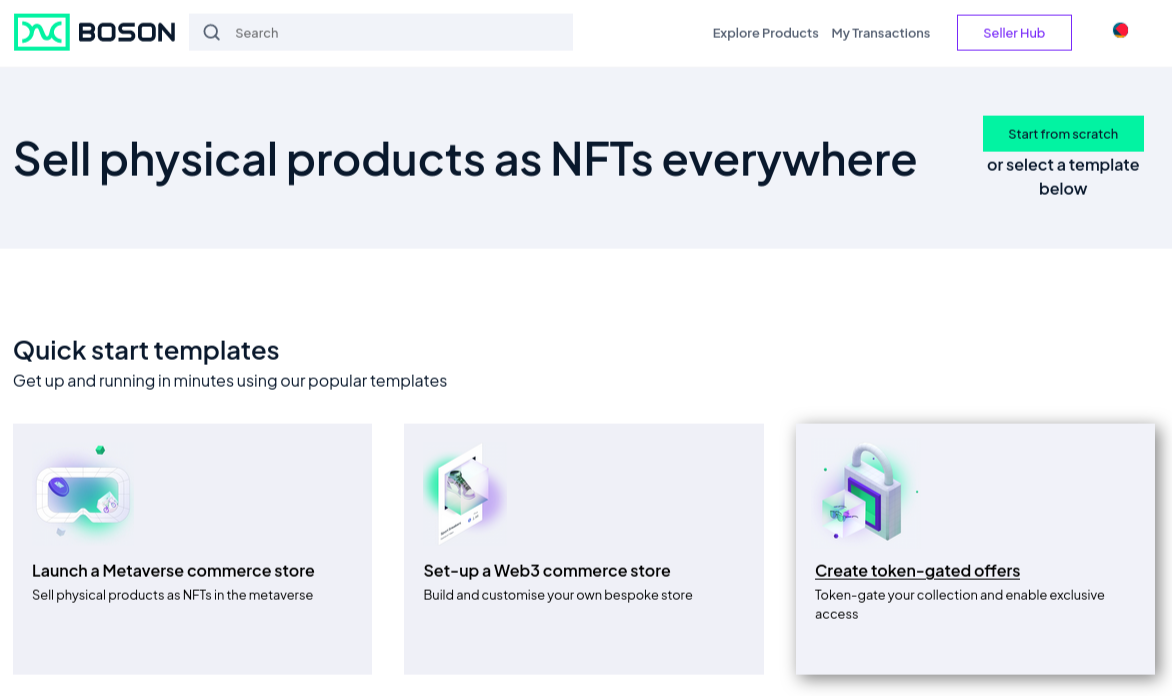
If you are going to be selling multiple items and you would like more functionality than a standard seller profile provides, you may optionally set up a storefront within the Boson marketplace dApp.
Setting up a storefront is free, and allows you to display your own products and also those listed by other sellers or specific offers, with your own colour scheme, font and branding.
Navigate to Templates & Guides in the footer of the dApp and click on
Set-up a Web3 commerce store.
You will see a step-plan of actions. To proceed click on Get started! button.

A two-column screen appears - on the left side you can customize the storefront, on the right side you can see updates in real time.
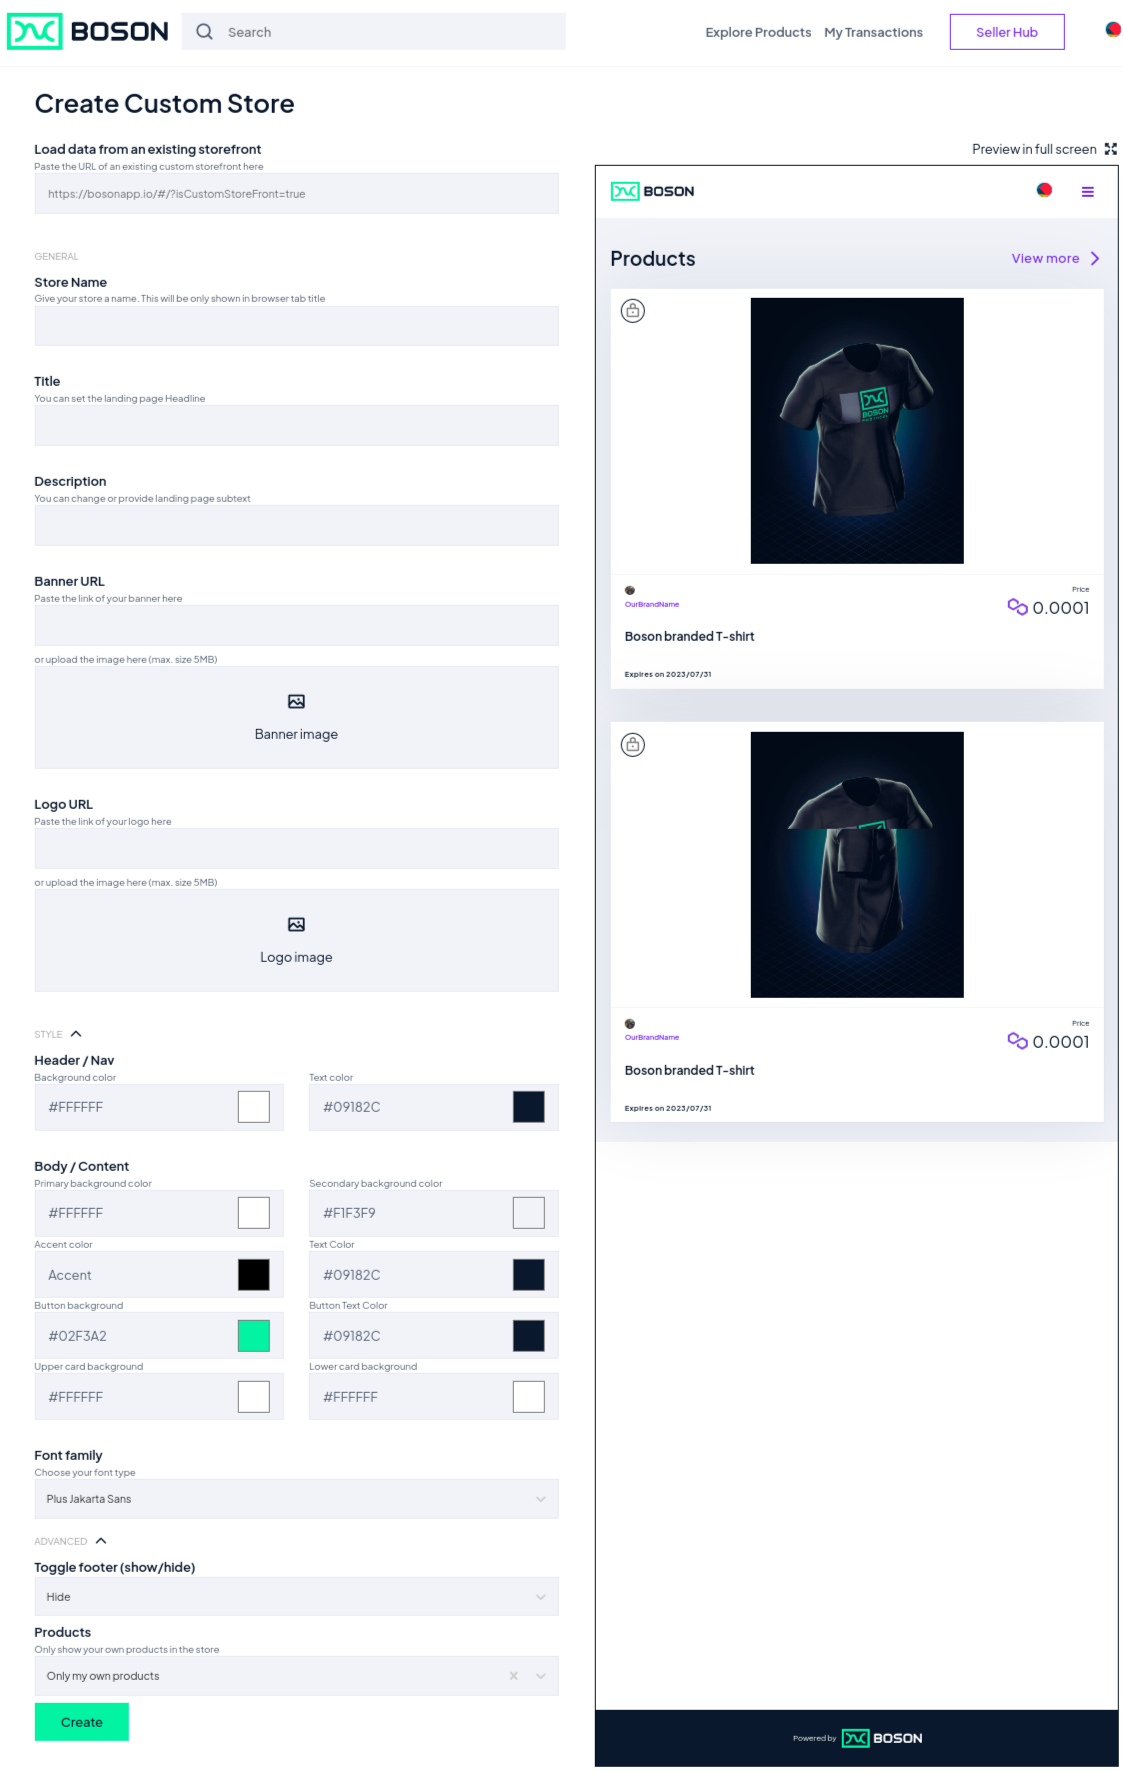
First of all, name your store. The first field should contain the name that is shown in the browser tab when people navigate to your store. This can be the same as, or different from, the Title, which is the headline displayed on your storefront.
The Description field allows you to enter subtext to explain a little more about the store. Keep it succinct so as not to clutter your landing page.
You can choose whether you upload your logo to IPFS via the Upload button, or whether you simply link to its location elsewhere.
The next stage is to choose your preferred colours and styles for header, footer and body content. Select the colour you would like for each, bearing in mind guidelines such as accessibility recommendations (for example, choosing text and background colour that are distinct from each other and easily legible).
Next, select your font family from the dropdown. This is enough to create a basic storefront, but there are various other advanced options that may be useful.
All fields in the Advanced section are optional.
Your storefront’s navigation will default to a header bar, but you can also choose to toggle it to a sidebar.
You may also choose to add a footer to the storefront – which can be configured here with copyright label, social media and other links – or to toggle the footer off completely, which is helpful if you want to embed the storefront in your own website.
The curation options allow you to add offers from other sellers, or to display only a subset of your own items. This may be useful if you are a seller with multiple brands, or with partnership deals with other sellers. Offer ids can be added as a comma-separated list.
You can also decide whether you want to enable metatransactions, where you pay your buyers’ Polygon transaction fees on their behalf to reduce friction and expense for them. In this case, you will need to sign up for an account with Biconomy and add your API key here.
Once you hit Create, your very own store is ready!
You will be presented with further options to make it friendlier.
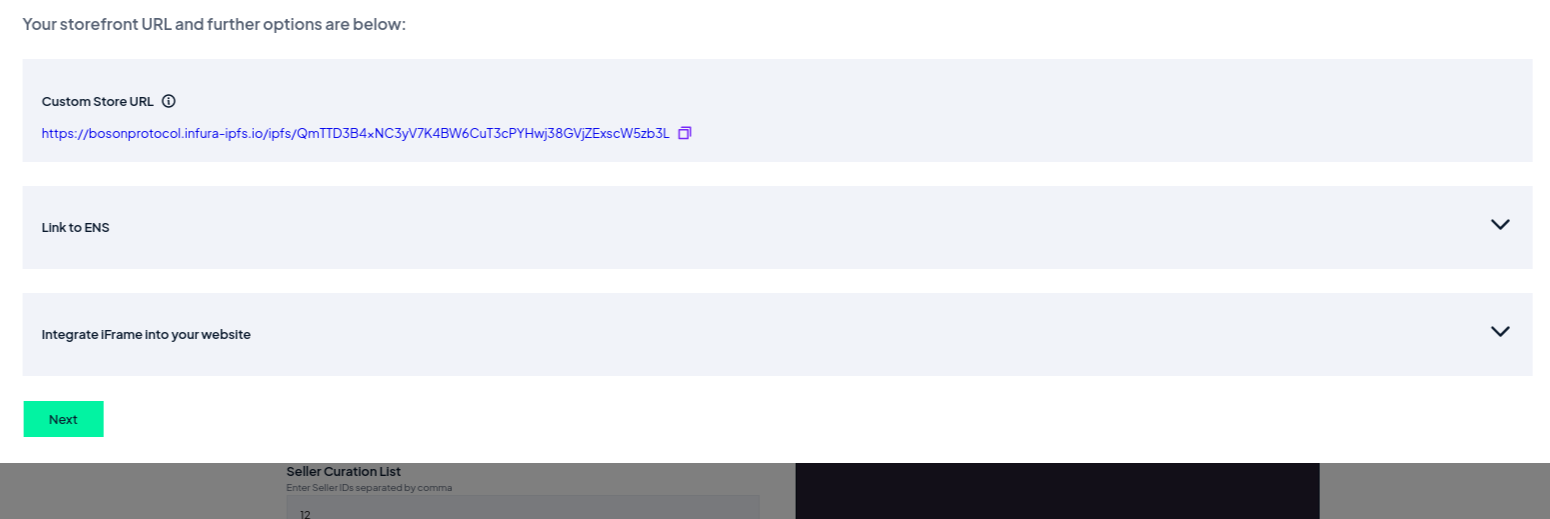
You will receive an IPFS link to your storefront (example, “https://bosonprotocol.infura-ipfs.io/ipfs/QmQcbJVmZSM4MGuBZBexRUVM1TdwBX4hfWzoHJwPFhNK3E…”). We recommend that you have an ENS domain ready to hide that IPFS link behind a friendlier name. You could even create a subdomain from your current ENS (example, store.myname.eth).
You can also leverage ETH Limo for easy access (example, https://myStore.myName.eth.limo). Additionally, you can also create a subdomain of your existing DNS and use that to link buyers to your storefront.