Boson for WooCommerce
Boson for WooCommerce enables creators and brands to sell physical products as NFTs, directly on your WooCommerce website. In just a few clicks, with our no code plug-in, you can elevate your website by enabling redemption, no matter where your Redeemable NFTs are sold.
If you already have a WooCommerce store, you have the added advantage of syncing your Boson offers and redeemed exchanges with your existing operational flows, such as order management and fulfillment.
How it works in 4 easy steps:
- Create a seller account and offers on Boson dApp (see our tutorial)
- Install the plugin and connect Boson seller account
- Design and customize your redemption page
- Manage orders and fulfillment like any other product on WooCommerce
Note: Using this plugin the seller doesn't need to do any blockchain transactions or pay for gas. The purpose of this plugin is to enable WooCommerce sellers to easily manage rNFT redemptions, disputes and delivery information.
Setting up the plugin
To use Boson for WooCommerce, you need to have a WooCommerce website already initialized.
Requirements
- A store must using at minimum: PHP 7.3, WordPress 6.0, and WooCommerce 7.4.
- The GMP PHP Extension. Depending on your hosting provider they may enable it for you if not already available.
- An SSL certificate.
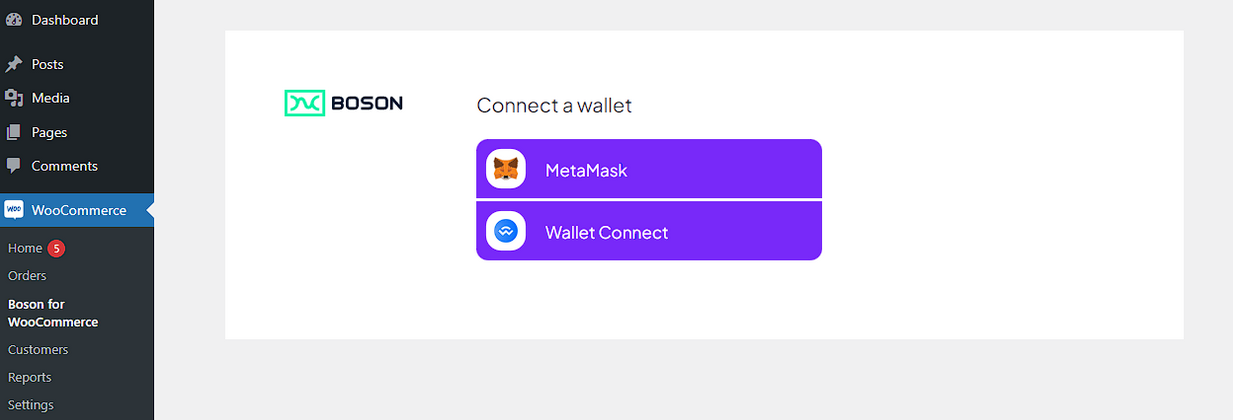
- A Web3 Client. Currently supported are MetaMask and WalletConnect.
Installing the Boson for WooCommerce plugin
Then, install the Boson extension like so:
- find the "Boson for WooCommerce" extension on WooCommerce Marketplace and download the .zip file,
- Go to:
WordPress Admin>Plugins>Add Newto upload the file you downloaded withChoose File. - Activate the extension.
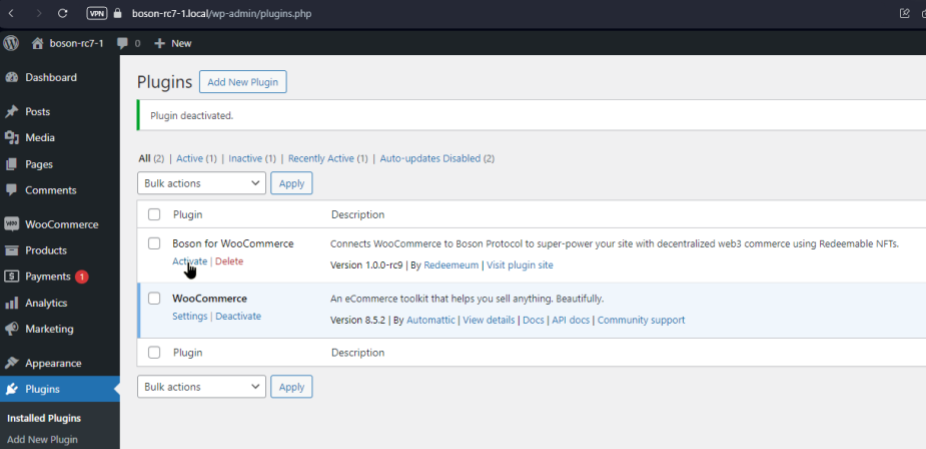
Note: If the extension is already installed and you are trying to update it, you will be asked to confirm if you want to replace the installed version with the new one found in the uploaded .zip file. In that case, proceed.
More information about managing plugins is available at: https://wordpress.org/documentation/article/manage-plugins/#Installing_Plugins
Connecting the seller account
After activating the plugin, we need to link the account used on Boson Protocol.
(1) Go to: WooCommerce > Boson for WooCommerce. (2) Select Connect Account
if you already have a Boson seller profile, otherwise, click on Create Account
to create one.
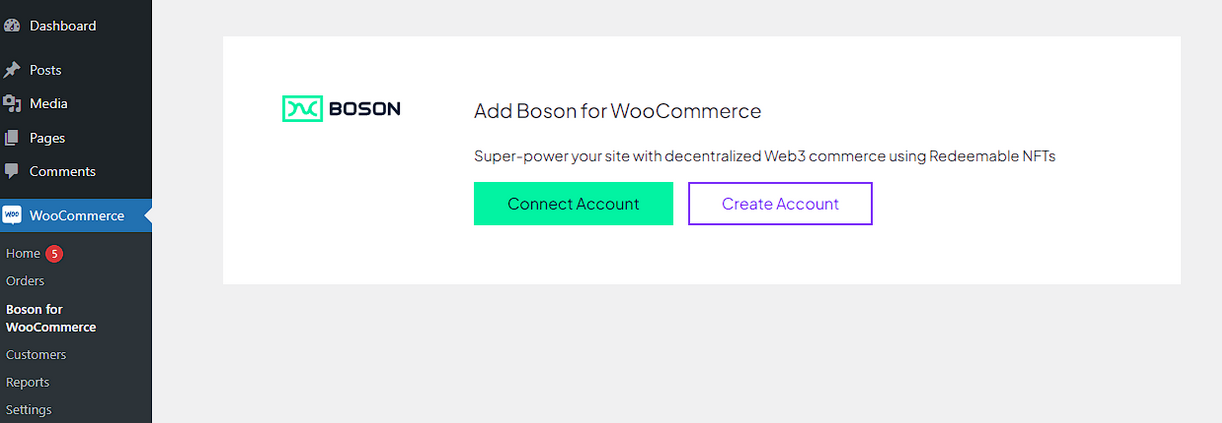
(3) Select a Web3 Client and connect your wallet.
(4) You'll see the connected wallet address, and the plugin will check the
validity of your seller account with Boson Protocol on-chain. Click Proceed if
the displayed wallet address is as expected, or connect a different wallet and
repeat the above step.
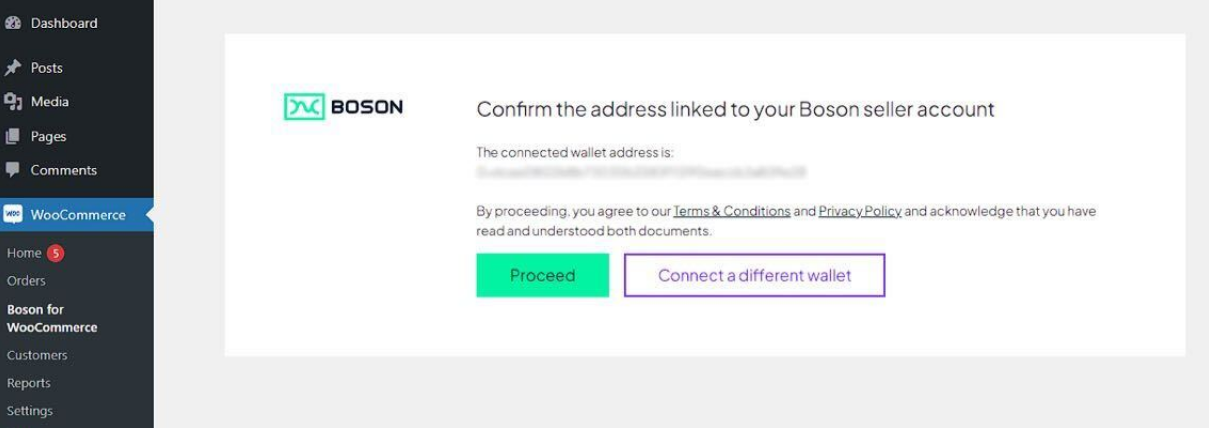
(5) Clicking Proceed will prompt you to sign a message through your Web3
client. This message will be used to secure the integration of the Boson
Redemption Widget to the particular domain of your website.
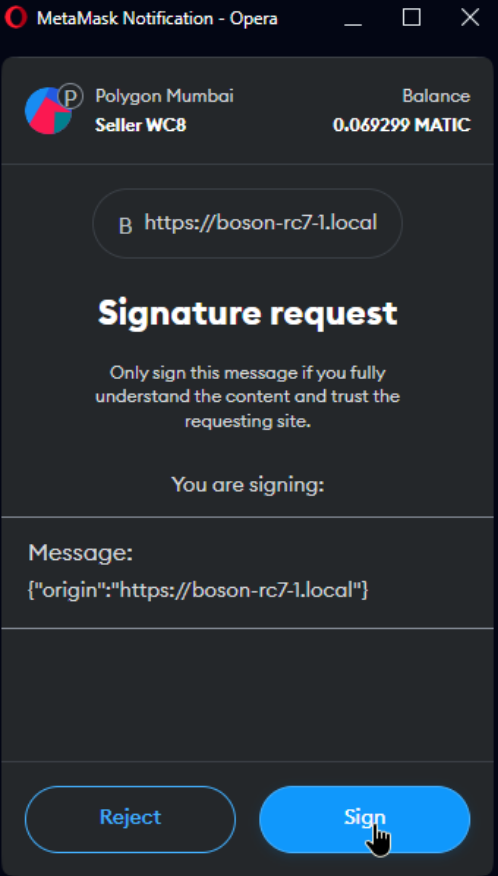
(6) Once your connected wallet address is identified as a registered Boson seller, the extension is ready for use!
Note: Signing message with the origin of your website (the URL) will protect the buyers from fraudulent seller pretending to be someone they are not. If the URL of the store will not match with your signed message of the allowed origin, the buyer will we warned and not able to proceed. Note also, that if the seller's address in Boson Protocol is changed, then the user will have to log-out from WooCommerce and log-in back to connect the new wallet. Doing so will preserve the previous data, linked products, exchanges etc.
Customizing the Redemption page
The Redemption page is where your customers will be able to redeem their rNFTs that they've purchased (the commit step) in your webstore, metaverse, NFT marketplace or anywhere else.
This is the page that should include the block (or shortcode) offered by the
extension for rendering the Boson Redemption Widget. Your customers will be able
to connect their wallet and redeem their rNFTs through that page or even raise
disputes for their already redeemed rNFTs. The extension offers an option to
create a very basic redemption page for you by clicking the
Create Redemption Page button, which you will be able to customize if you wish
to!
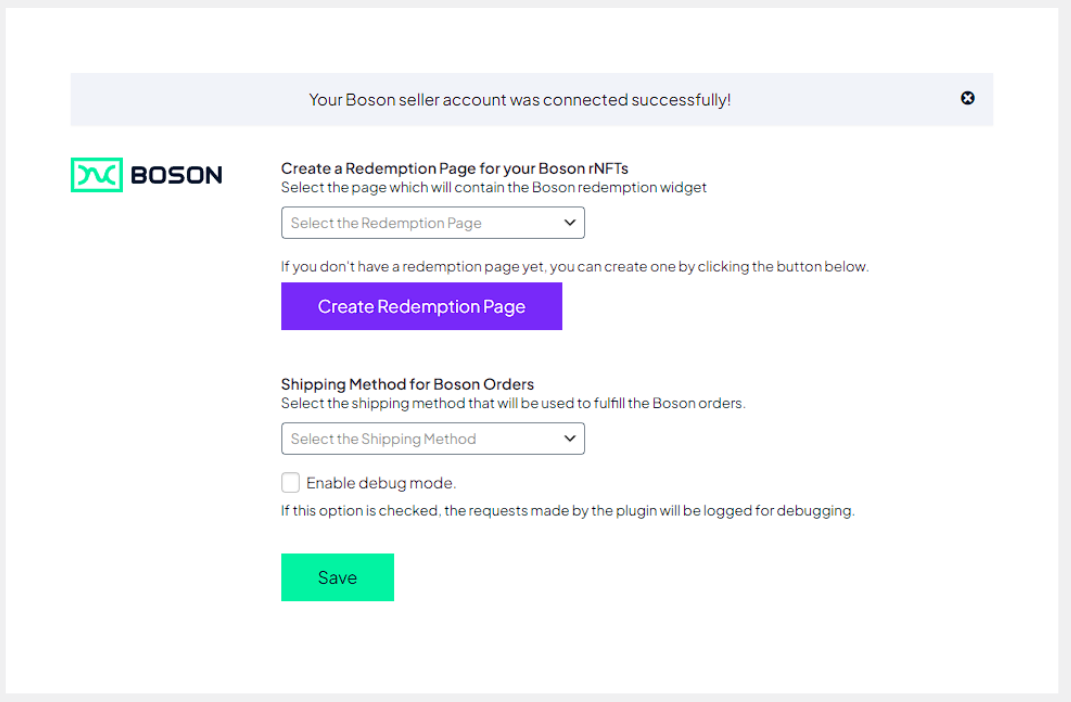
The extension offers two blocks to render the redemption widget:
Boson Button Widget: This block renders a button that can be customized to follow the same style lines from your website. When the user clicks on the button, the redemption widget is rendered in a modal window.
Boson Widget: this block embeds the redemption widget directly on the page.
Alternatively, the extension also offers two shortcodes as a fallback in case your active theme doesn’t support blocks:
[boson_button text="TEXT_TO_BE_RENDERED_IN_THE_BUTTON"]
This shortcode renders the redemption button, with the default rendered text being “Redeem”.
[boson_widget]
This shortcode renders the embedded widget directly on the page.
Once the Redemption page is created, you will also be able to find it under the "Pages" tab on the left menu of WooCommerce as well.
Shipping method
You can specify the shipping method that will be used for all Boson orders. The shipping method, regardless of its registered cost, will be attached to the order at 0 cost for the customer. Third party integration with shipping (if applicable), will be able to pick up the registered shipping method from each Boson order.

Synchronizing data
Once the seller's Boson profile is linked to WooCommerce, the data will start synchronizing between Boson Protocol and Boson for WooCommerce plugin.
The data that is synchronized includes products, buyer redemptions and any potential disputes raised. The sync task runs every 30 minutes, but can also be run manually on demand.
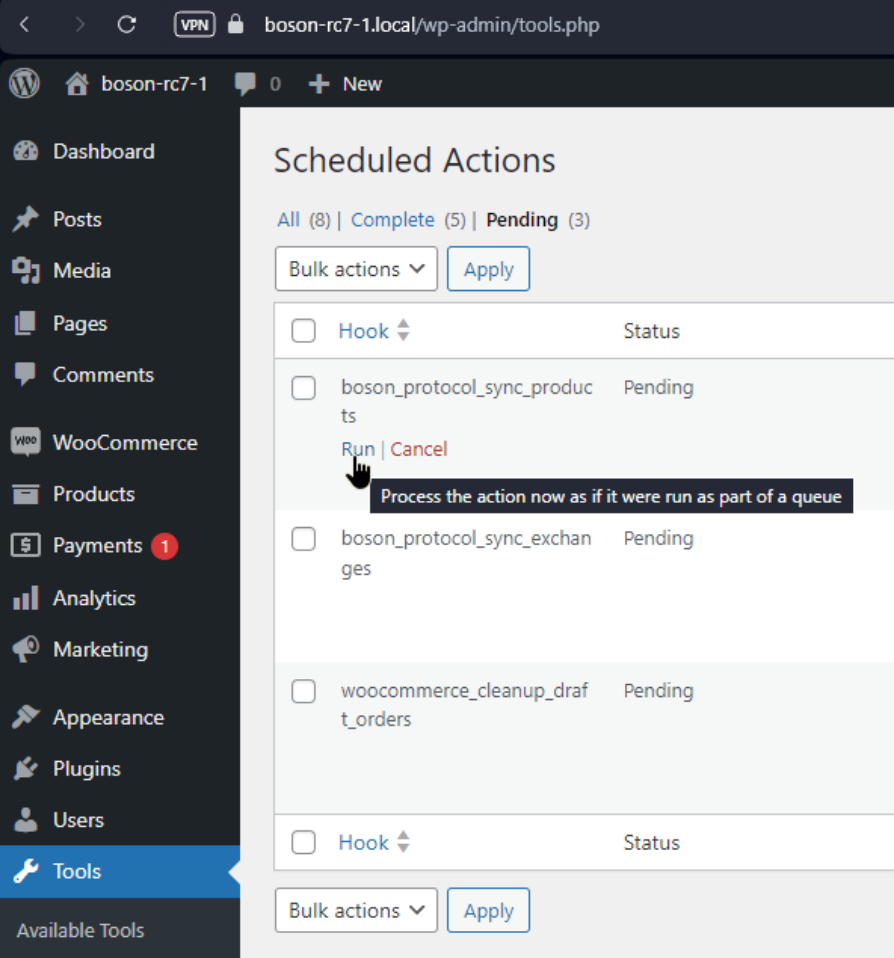
Note: If the buyer redeems an rNFT outside the WooCommerce plugin, a warning is displayed that this order should be managed elsewhere, i.e. via the Boson dApp. This is needed because the delivery information and other buyer-seller communication must have happened outsite Boson for WooCommerce plugin, so the plugin has no way of accessing that data.